 Your desktop or laptop PC can join into the Cloud VM network. You can make the Cloud VM as if it is on your local network easily.
Principles
If you want to use these protocols and applications beyond the distance of local-network and Cloud VM, you have to use VPN. SoftEther VPN is the easiest and dependable VPN software to establish a link between your local PC and your Cloud VMs.
As same as VPN for On-premise, you can treat your VM on the Cloud as a PC which is located on the remote and isolated place. You can set up SoftEther VPN Server on the Cloud VM. Then you can gain direct access to your Cloud VM's operating system network stack as if the Cloud VM is connected to your local PC directly.
Step 1. Set up SoftEther VPN Server on Cloud VM

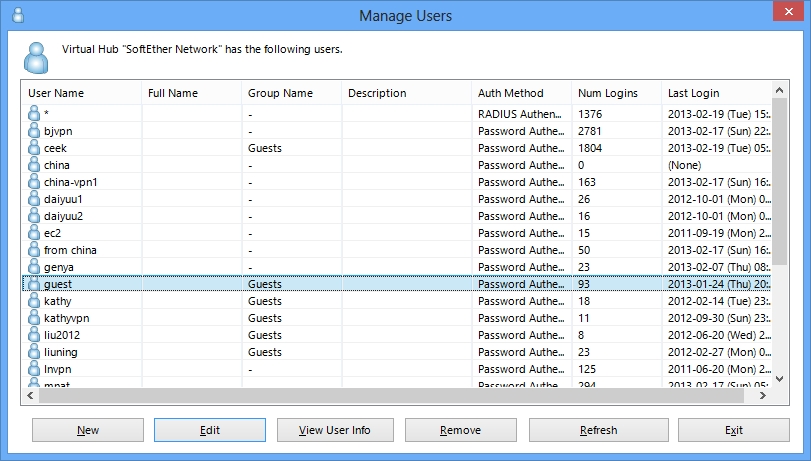
Step 2. Create Two Users
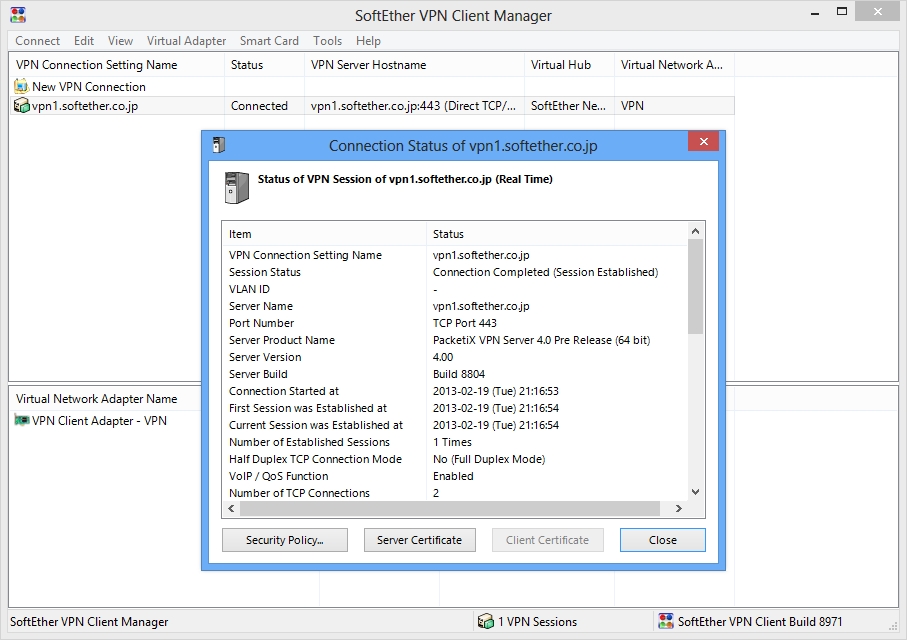
Step 3. Set up VPN Client on Cloud VM
In order to make the Cloud VM access to the Virtual Hub, set up SoftEther VPN Client on the same Cloud VM. After setting up VPN Client, configure it to connect to SoftEther VPN Server on the localhost by using the created user "local" .
Step 4. Set up VPN Client on Your Local PC
If your PC is not Windows but Mac OS X, iPhone or Android, set up L2TP/IPsec VPN client on each PC instead of SoftEther VPN. Another solution is to use OpenVPN Client on Mac OS X, iPhone or Android to connect to SoftEther VPN Server.
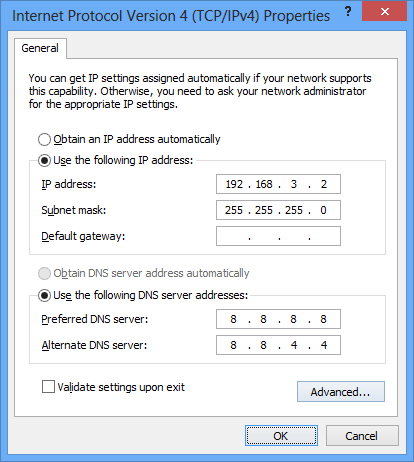
Step 5. Set up IP Addresses
Like the physical Ethernet, the simplest way is to set up private IP addresses to each IP nodes, for example 192.168.0.0/24. Make sure not to overlap to physical-using private IPs.
Another solution is to use DHCP server for automated IP address allocation. You can activate Virtual DHCP Server Function on the SoftEther VPN Server and it will distribute 192.168.30.0/24 by default.
Step 6. Communicate Like Physical Ethernet
