Here is the instruction how to connect to your SoftEther VPN Server by using L2TP/IPsec VPN Client which is built-in on Windows XP, 7, 8, RT, Server 2003, 2008 and 2012.
On this instruction, we use Windows 7 screens. Windows XP and Windows 8 are similar, however there are a little number of changes.
1. Initial configurations (only once at the first time)
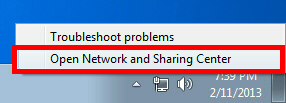
Right-click the network icon on the bottom-right side of Windows screen, and click "Open Network and Sharing Center" .
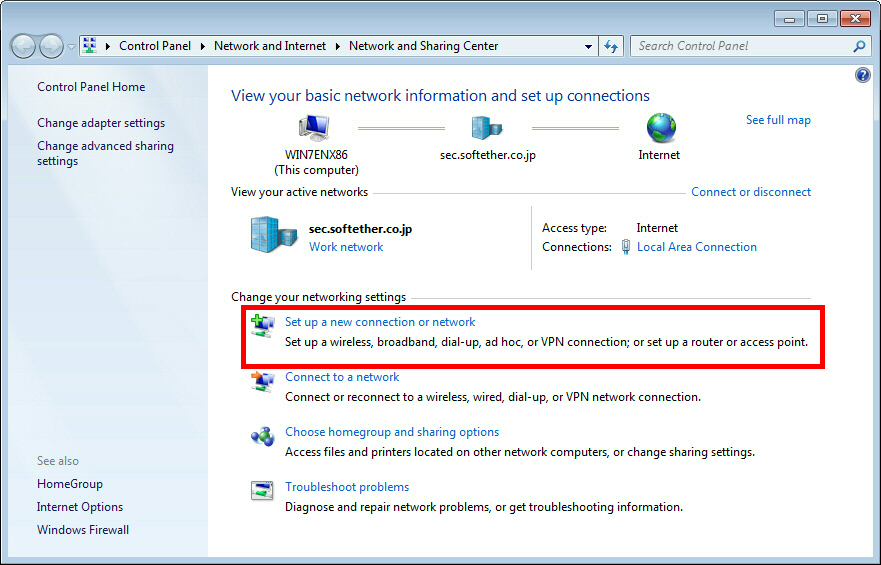
Click "Set up a new connection or network" on the "Network Sharing Center" .
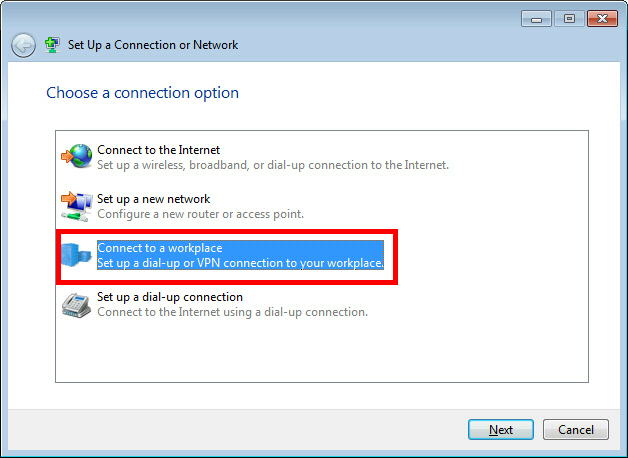
Select "Connect to a workplace" .
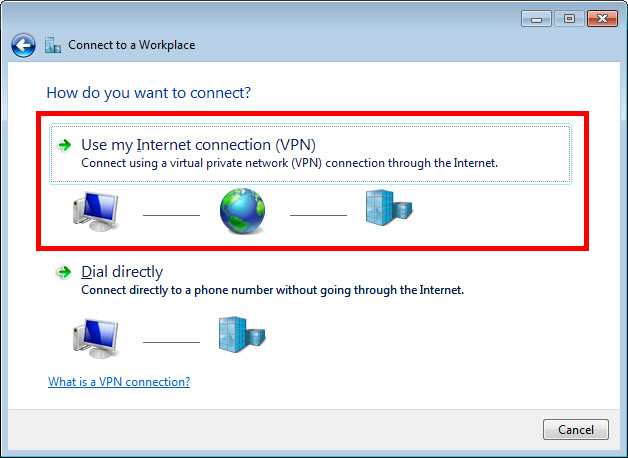
Select "Use my Internet connection (VPN)" .
You have to input the destination SoftEther VPN Server's IP address or hostname here.
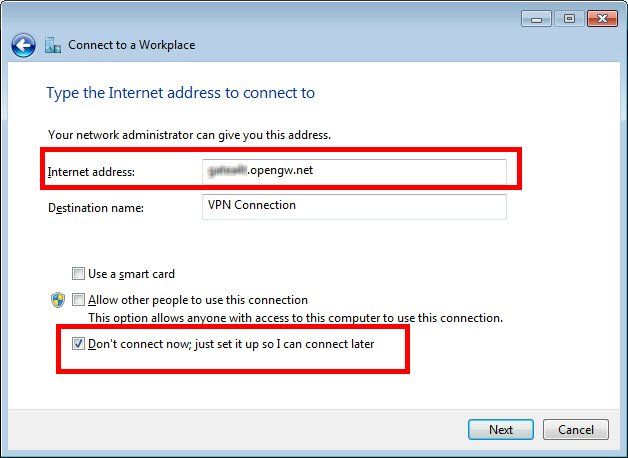
Enter either hostname or IP address on the "Internet address" field on the configuration wizard.
After you enter the "Internet address", check "Don't connect now; just set up so I can connect later" checkbox on the bottom of the screen surely.
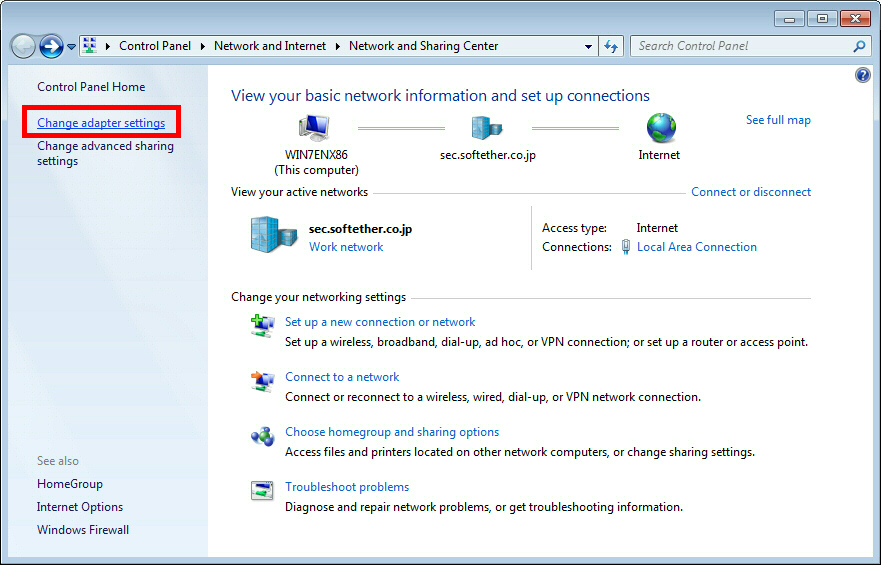
Go to "Network and Sharing Center" and click "Change adapter settings" .
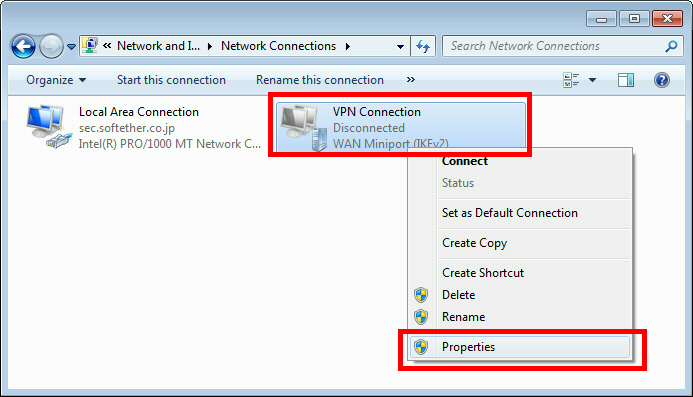
The currently defined VPN connection settings are listed. Right click the icon you created in the previous step, and click "Properties" .
On the Properties screen, switch to the "Security" tab. (In Windows XP, switch to the "Network" tab.) Choose "Layer 2 Tunneling Protocol with IPsec (L2TP/IPSec)" on the "Type of VPN" drop-down list.
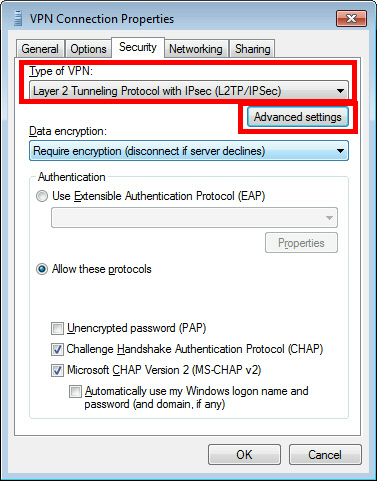
Next, click the "Advanced settings" button. (In Windows XP, click the "IPsec Settings" on the "Security" tab.)
The following screen will appear. Click "Use preshared key for authentication" and input the pre-shared key on the "Key" field.
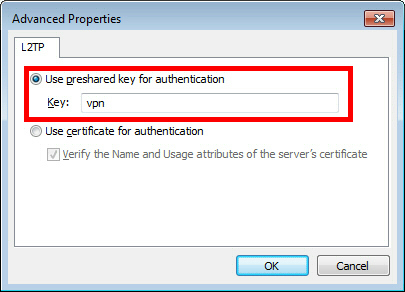
After the above configuration finished, click the "OK" button twice to close the property screen of the VPN connection setting.
2. Connect to the VPN Server
Click the "Connect" button to start the VPN connecting attempts.

While the VPN is trying to be established, the following screen displays statuses. If an error occurs, confirm your settings make sure that the type of VPN is "L2TP/IPsec" , and the pre-shared key is correctly specified.

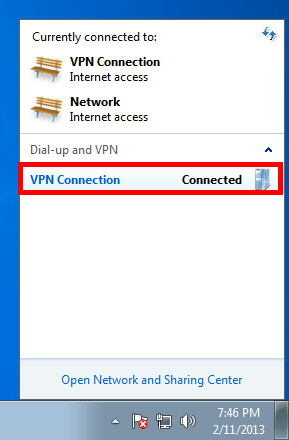
If the VPN connection is successfully established, a VPN connection icon will be listed on the screen which appears when you click the network icon on the bottom-right of Windows screen. The status of the VPN connection icon should be "Connected" .
By the way, you can initiate the VPN connection by simply clicking this VPN icon from now on.
3. Enjoy VPN communication
While VPN is established, all communications will be relayed via the VPN Server. You can access to any local servers and workstation on the destination network.